
Oracle released their new 12C edition of Oracle Fusion Middleware so lets have a look at some of the changes. We are going to make a simple Service Bus project which will take two currencies as input and will return the exchange rate. I installed locally Weblogic 12C and created a base domain. For a brief description how to install SOA Suite 12C see here. After you have installed weblogic, lets start up JDeveloper.
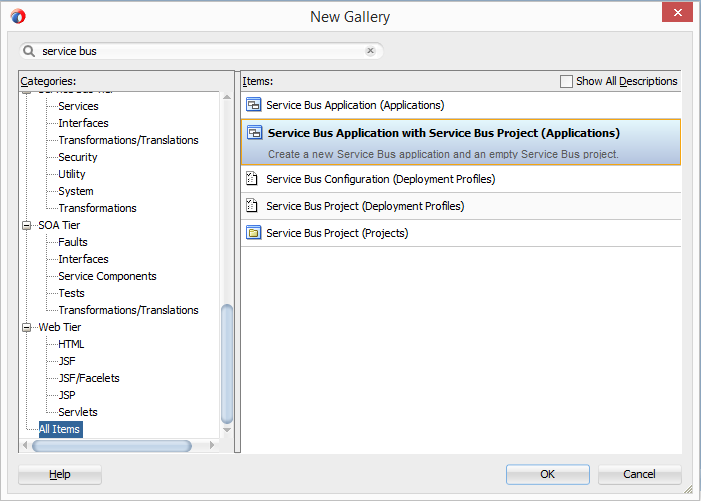
JDeveloper looks a bit more slick then before which I like. Ok, lets start. Choose File->New->From Gallery or press Control-N. Type in Service Bus and choose Service Bus Application with Service Bus Project (Applications).
Choose an application name with package prefix and project name. I will name mine RedRockServiceBusApplication with prefix nl.redrock and ExampleSBProject. Press Finish and there you go….a new Service Bus application with project.
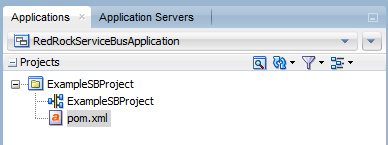
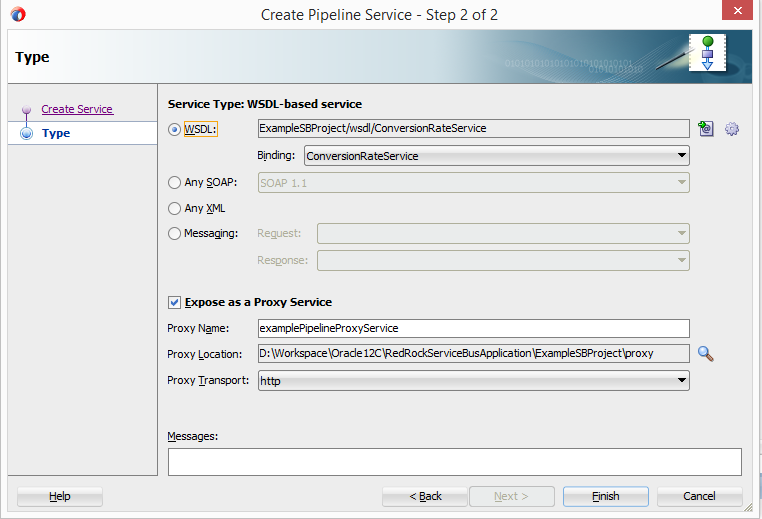
As you can see, the project now comes with a POM file which will be used for building the project using Maven. The project does not have any predefined folders so lets create a proxy and business folder for the proxy and business services. Now select the ExampleSBProject.sboverview which opens an editor which looks like the 11G SOA composite editor with a Proxy Service lane on the left, an External Services lane on the right and a Pipelines/Split Join lane in the middle. First lets create a pipeline by dragging a pipline onto the middle lane from the components area. Name it examplePipeline and press Next. In the next screen choose select the WSDL radiobutton and press the Browse WSDLs button on the right of it.
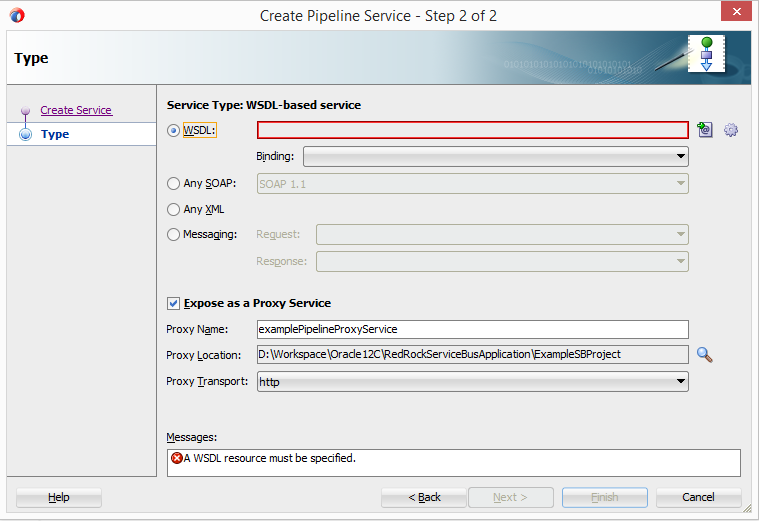
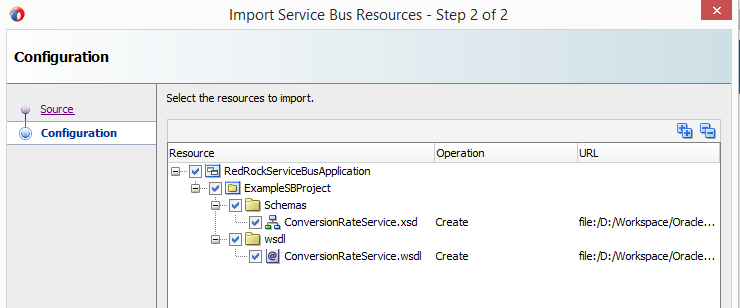
From here you can choose a WSDL which you want to use as base for your proxy service. I had an old WSDL lying around from an example project so I select this using the Filesystem tab. After the selection you will have an option where to import the WSDL to. I create a new folder wsdl in which to import the WSDL. In the next screen you can see JDeveloper being smart. It sees that the WSDL uses a XSD which he also want to import for you. As you can see, he will import the schema into the Schemas folder.
Press finish and keep the checkbox Expose as a Proxy Service checked. You can also choose in which folder you want JDeveloper to create the Proxy service. As we have a proxy folder, select that and press finish.
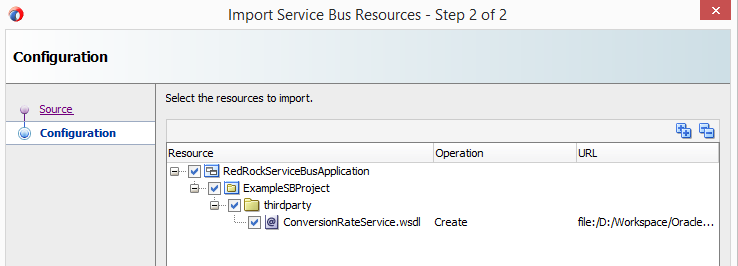
Now we have a pipeline with an proxy service. Now we just need a business service which we are going to invoke. Drag the HTTP icon from the Components tab onto the right External Services lane. A new popup opens where you can name the business service and choose its location. Choose the business folder we created before. In the next screen you can choose the WSDL. Like we did before for the proxy service, select the WSDL radio button and press the Browse WSDLs button on the right of it. I am using a public service located at http://www.webservicex.com/CurrencyConvertor.asmx?wsdl. I also added the WSDL’s and XSD’s I have used to this post so you can re-create this example. Select the WSDL and choose a folder where to import it. I created a folder thirdparty. Don’t forget to set the port to CurrencyConvertorSoap12.
Click Finish and the Next. Here you can choose the transport. Choose http and http://www.webservicex.com/CurrencyConvertor.asmx as endpoint and press Finish. Now connect our examplePipeline to our just created business service using the arrow block. Now your osb project should look something like this:
![]()
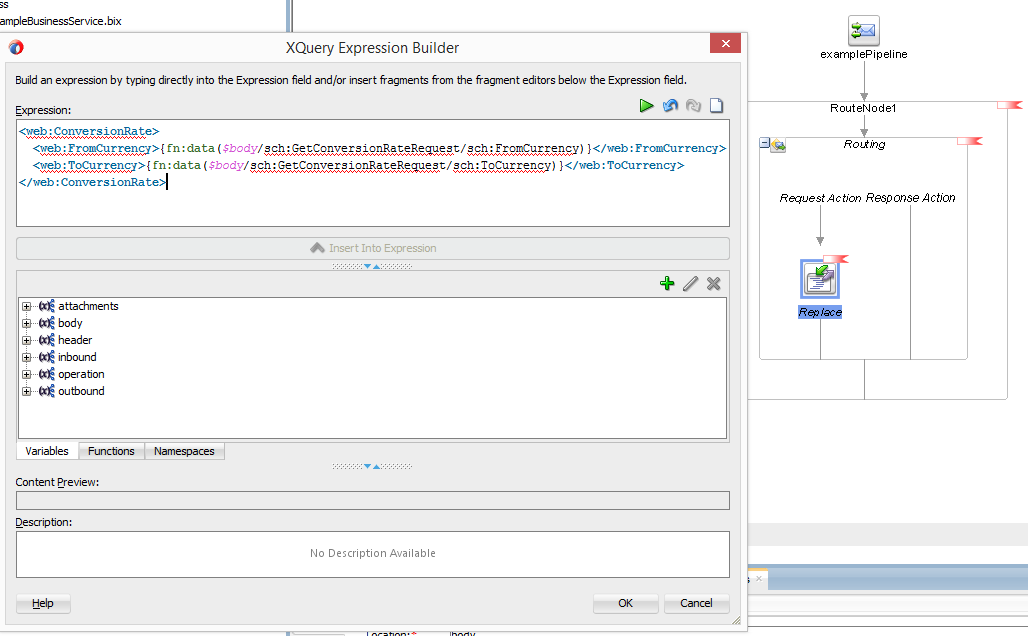
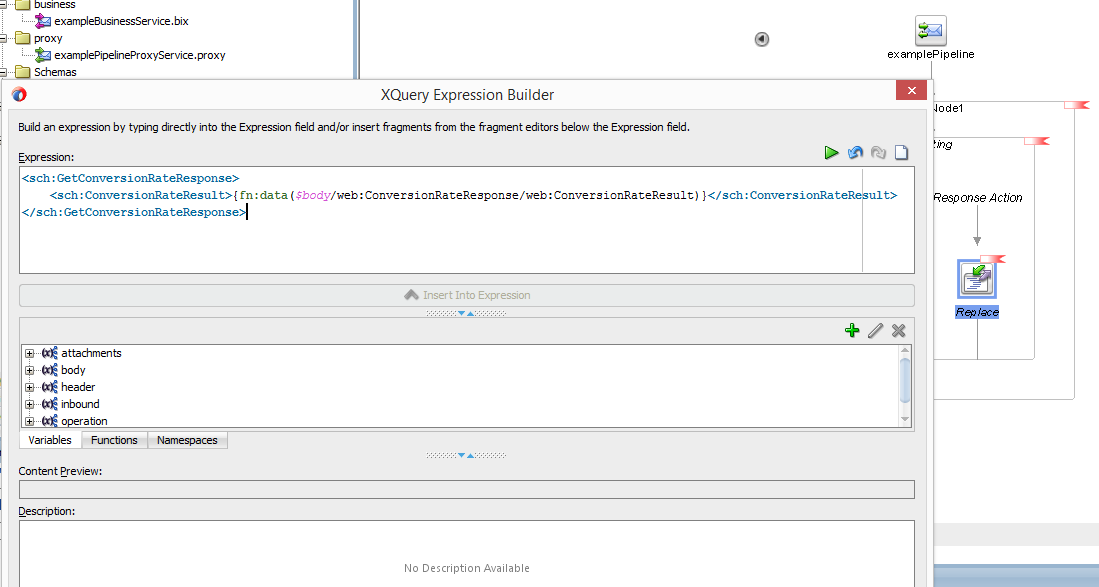
Now it is time to edit the pipeline. Double click the example pipeline and an editor opens which you are used of the old Eclipse OSB IDE. You can see a RouteNode1 and a Routing has already been inserted when you connected the pipeline with the business service. The services takes two input parameters in the form of two currencies which we have to transform to the business service. As it is the first simple service I will just do the two replace actions to transform the input and output. First the input. Drag the Replace icon from the Components pallet to the request action lane. In the properties you can now edit it. I know what the request to the business service will have to look like so I replace the body using a simple Expression instead of using a xquery or XSLT. Don’t forget to add the web namespace(http://www.webserviceX.NET/) in the third tab down below and the sch namespace(https://www.redrock-it.nl/conversionrate/service/schema). This will look like this.
Now lets do this also for the reply flow. Drag the Replace icon from the Components pallet to the response action lane. This will look like this:
So now our very simple service is done and can be deployed. You can use the integrated WLS or one you installed seperately. I am using a seperate instance. Deply the service. After this is successfully done you can access the WSDL at the following address: http://localhost:7001/ExampleSBProject/proxy/examplePipelineProxyService?wsdl. As I need this service for a next post I will test the service using SoapUI. I create a new project using the WSDL and test the service which should give below result:

So this is an example of a simple service using SOA Suite 12C. Here is a link to the complete project zip:
Pingback: Building a simple service using Oracle Service Bus 12C | Hugo Hendriks
Pingback: Creating a template in Oracle Service Bus 12C |
Pingback: Creating a REST service using the 12C Service Bus |
Hello , l tried to follow your tutorial but lm getting this an error , Here is a full description of my project :
l created a business service using an existing WSDL file ie Requisition WSDL , then l created a proxy service using existing Purchase Order swdl file and in the messaging option l then specified purchase Order xsd file as request and response .l then created a XSL Map file and in the CREATE SXL MAP l used Purchase Order schema as the Source and then l used Requisition Schema as Target .After creating a XSL file l did a auto Mapping from source to target schema . l then connected the pipeline to business service and this automatically created RouteNode with routing and inside routing the request Action and Response Action were created . With Pipeline opened l dragged the REPLACE component from pallete to Request Action .On the Replace properties l selected BODY as Location ,in the XPATH used this expression $body-request and the value l used XSLT resources and in the XSLT resources window l selected the xsl file l created and in the input document expression l entered $body-request .The problem here is that when l test my proxy services there is any error in the Pipeline route node saying Cannot find dispatch method for {http://PurchaseOrder.Purchasing.Service.Omnistall/}arg0 which is purchase order targetNameSpace
lm using Jdeveloper 12C
l tried to follow your tutorial but my getting an error please check my project screen shot here
http://www.keepandshare.com/doc2/show.php?i=2603724&cat=1
I did not get the old wsdl part. Is it a concrete wsdl(deployed to the server) or an abstract wsdl which is used/?
It was an old WSDL I still had from a previous project so it was located on my filesystem. It was not deployed on any server.
Pingback: A first glance at Mule's API capabilities
Pingback: Creating a REST service using the 12C Service Bus
Pingback: Creating a template in Oracle Service Bus 12C