
In Part 1 we designed the API. In Part 2 we made the implementation and in Part 3 I will show you how you can manage the API. Lets get started.
Our starting point is a deployed API which is publicly accessible. You can imagine you want at least some form of security for example a client-id en client-secret or IP whitelisting. Next to that you might want to make a difference between clients who can make unlimited calls and who can only make a certain amount of calls per hour. And in the end, we want to be able to see how our API is used so a dashboard would be nice.
Security
Lets first start with 2 security features we want to configure:
- Client-Id and Client-Secret
- IP Whitelisting
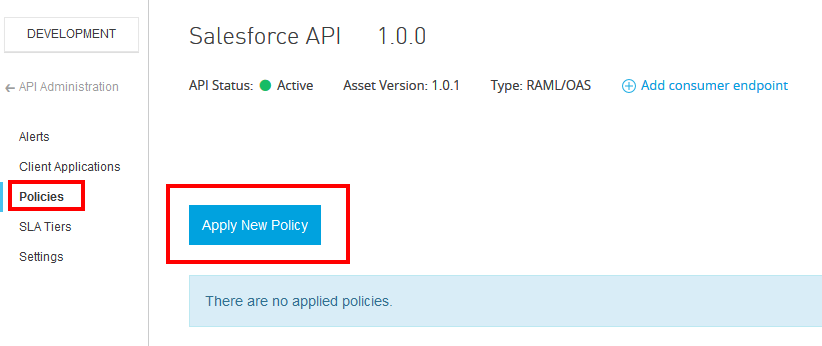
Lets start of with the most simple one….IP whitelisting. Go to the API Manager and click on the API you want to secure. Next select Policies and Apply New Policy.
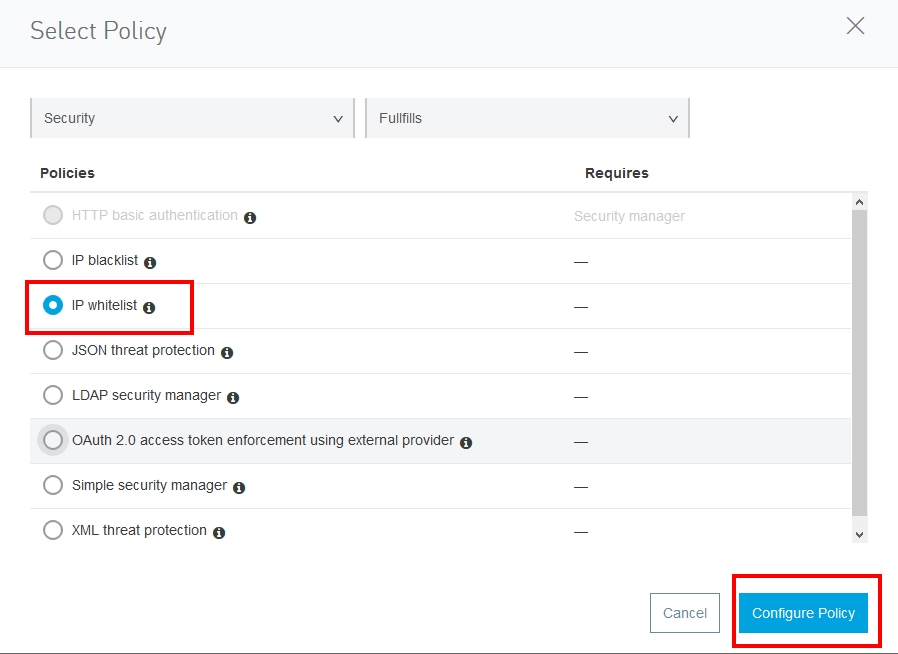
Next select the IP Whitelisting policy. As you can see you can choose a bunch of them out-of-the-box. Just select the IP Whitelisting one and press Configure Policy.
In the next screen, add the ip or multiple ip’s you want to whitelist. You can also choose to apply the policy to all API methods or to only specific ones.
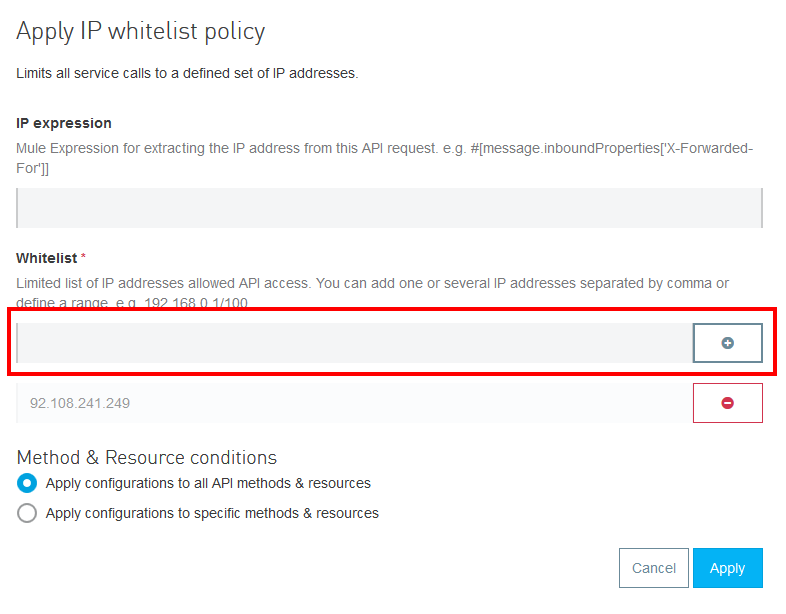
Once done, press Apply. Now lets try out the API with an IP which doesn’t match the filter.
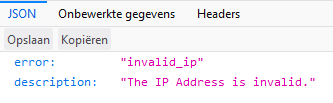
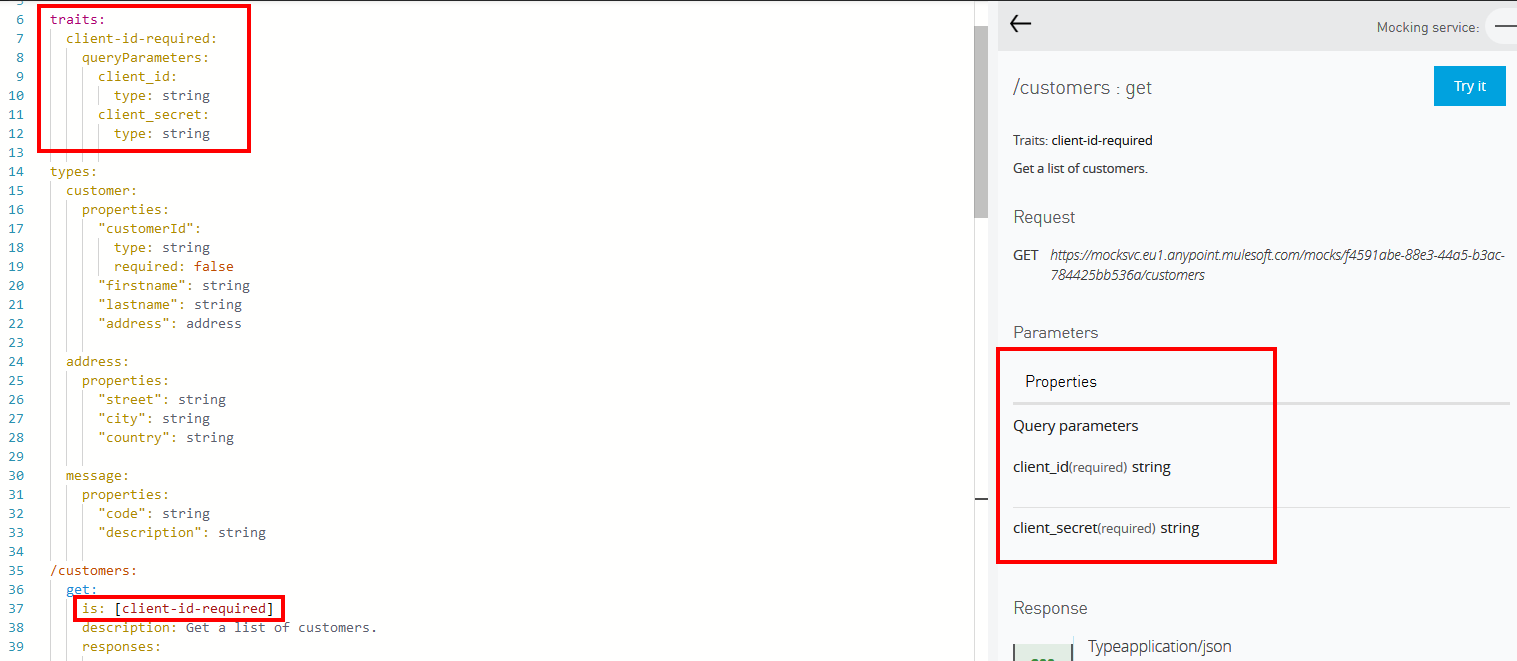
and voila….the filter works. Next up is the Client ID enforcement. Again go back to the policy and click Apply New Policy. Select the Client ID enforcement policy and click Configure Policy. This policy will need certain definition in the RAML. What you need to input you can find when you click the RAML snippet.
 .
.
Lets go back to the Design Center and insert the RAML snippet into our API design. On the right, you can immediately see the impact on the operations. The Client-id and client-secret are now required query parameters.
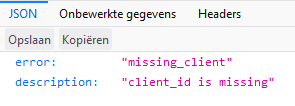
Lets save it and don’t forget to publish it to Exchange. Now lets make a request and see what we get without the client-id and secret.
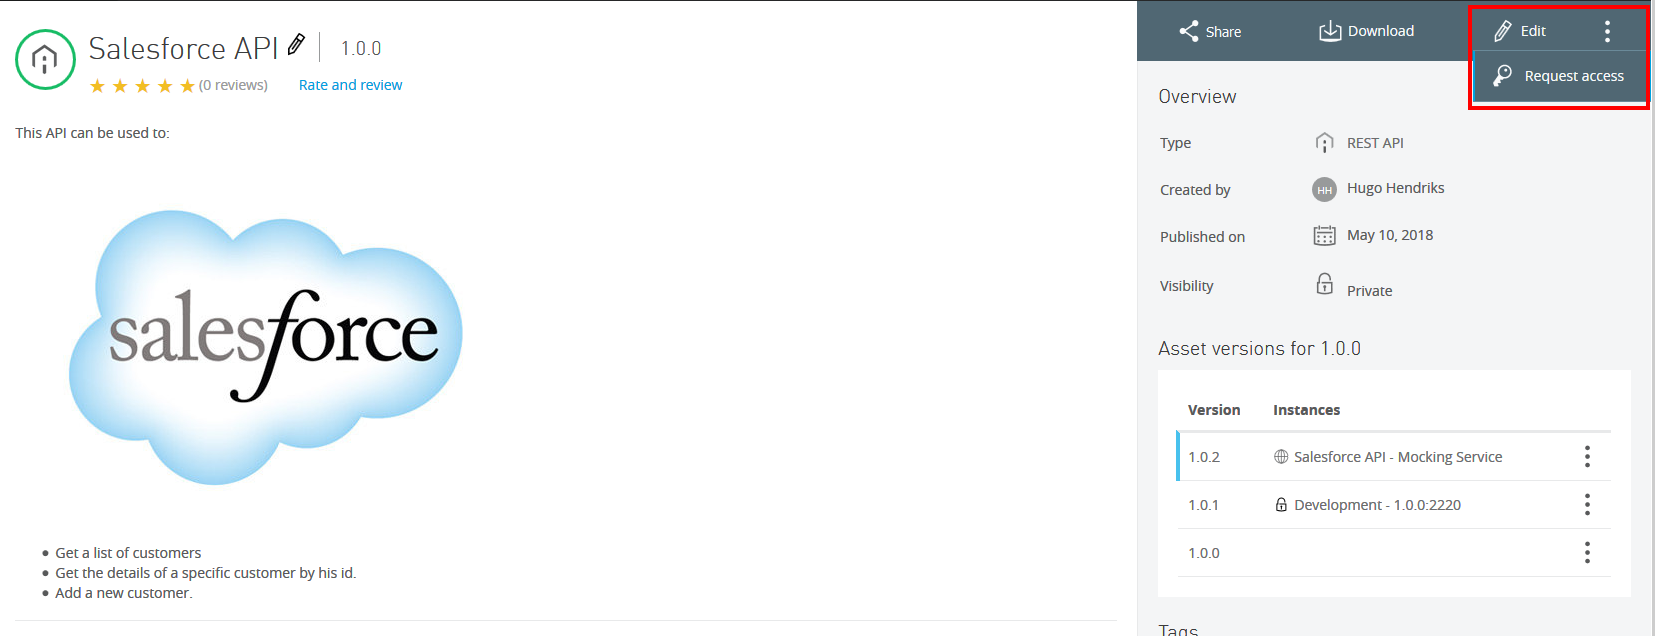
So that works but I would also like to see it work with a client id. So how do we obtain it? Very simple. You just go into Exchange, look up the API and request access in the top right.
In the next screen select Create New Application as we don’t have any applications. Give you application a name and an optional description and click Create. Now select the Application you just created, select for which API instance you want to have access and skip the SLA tier for now. Click Request API Access.
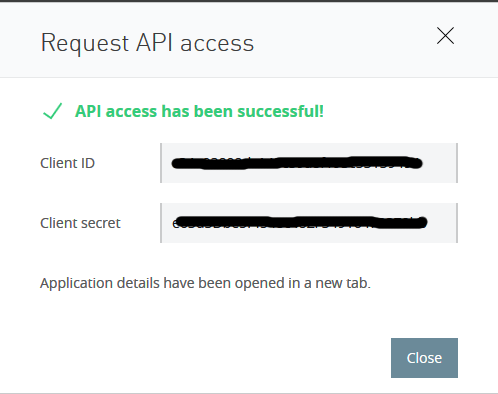
The pop-up now shows your client id and secret. If you go back to the API Manager, select the Salesforce API and click on the client applications on the left, you can now actually see the newly requested application. Here you can also change revoke access or delete the application. But now for testing it. Just add 2 query parameters to your request being client_id***YOURID***&client_secret***YOURSECRET***.
SLA management
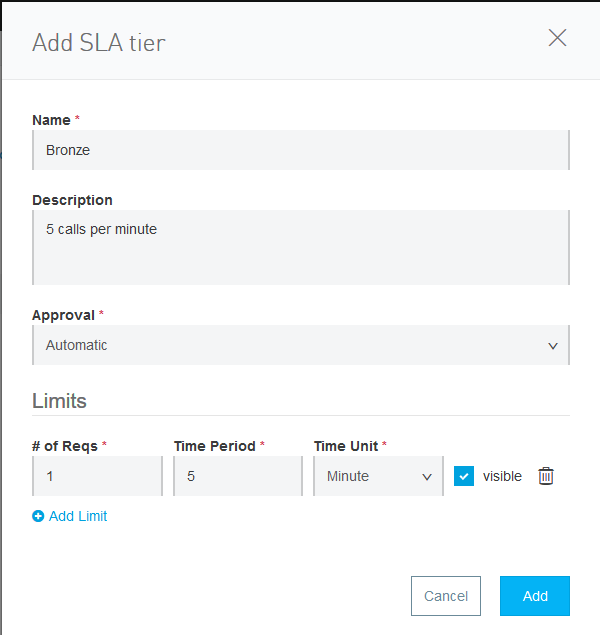
Next up we want add some Service Level Agreement management. Lets say we have 2 levels. We have bronze and silver. Bronze is 5 requests per minute, silver is 100 per minute. Go to the API Manager, select our salesforce api and click on it. Next click on SLA Tiers on the left side and click Add SLA Tier. Fill in the details for our bronze SLA and click Add.
Next up, you can request access again with a new application or you can edit your previous one by adding the newly created SLA. Next up we need to add a policy. Be aware that you can’t select the Client ID Enforcement policy and the Rate Limiting SLA based which is also based on the client id and secret. So just disable the client id policy and add the new SLA based one. Now let’s try and call the endpoint with our client Id en secret 6 times within 1 minute. The first 5 work like a charm and the 6 time, we get the following message:
API calls exceeded
Going back to the main API screen, you can also see the violation in the Request graph if you check the Include Policy Violations checkbox.

So there we go. We saw how we can easily manage the API by configuring policies and configuring them. Now for the monitoring part.
Monitoring
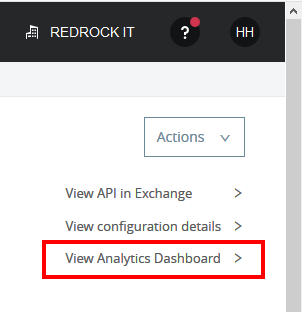
We would like to keep an eye out how the API performs and how it works so to do that, we need to make an analytics dashboard. Go to the API and click on View Analytics Dashboard on the right side.
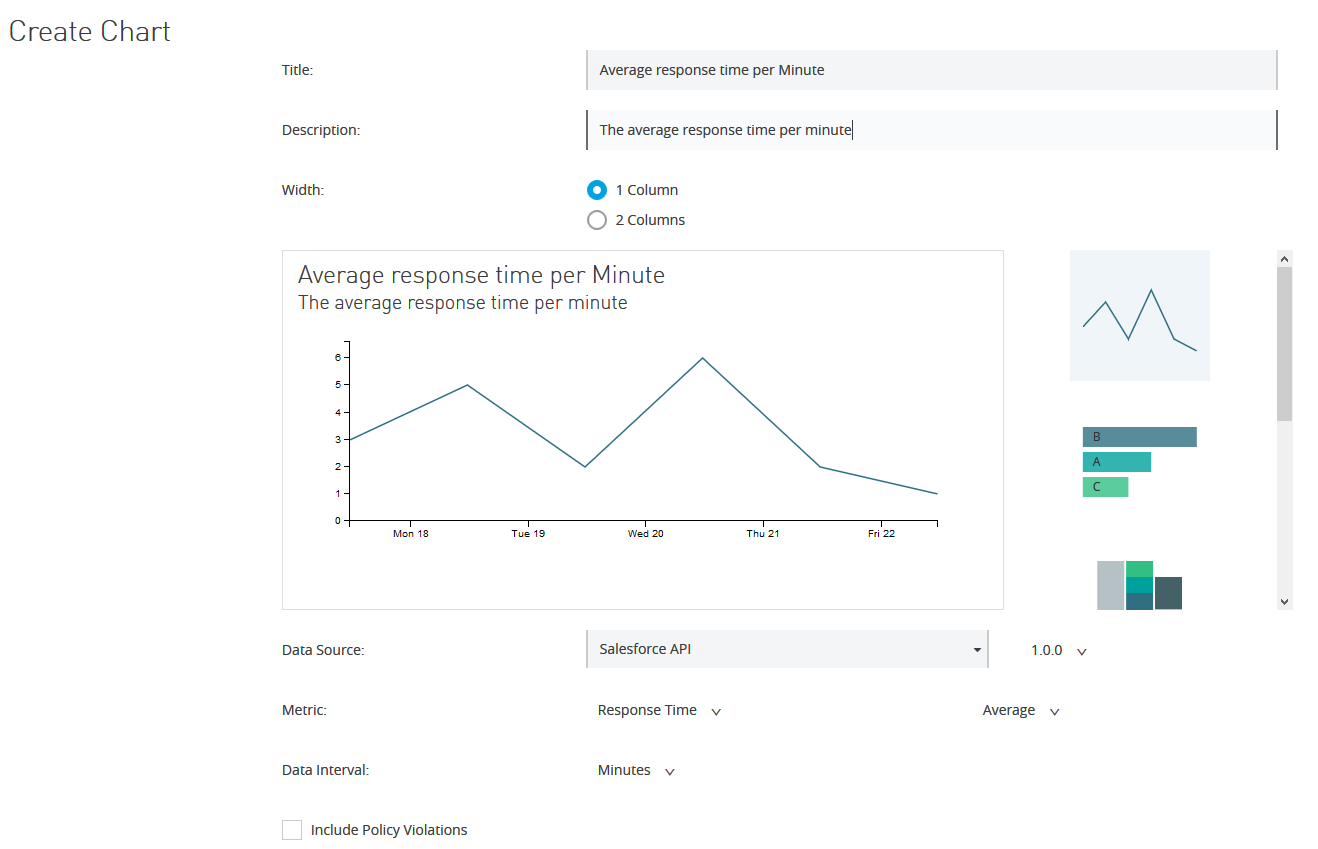
Next up you will see the dasboard out of the box. So Requests by Date, Requests by Location, Requests by Application and Requests by Platform. Let try to make a custom chart with response times. Click Manage Charts on the left and then Create New Chart. Next input all the values you want to see in the graph.
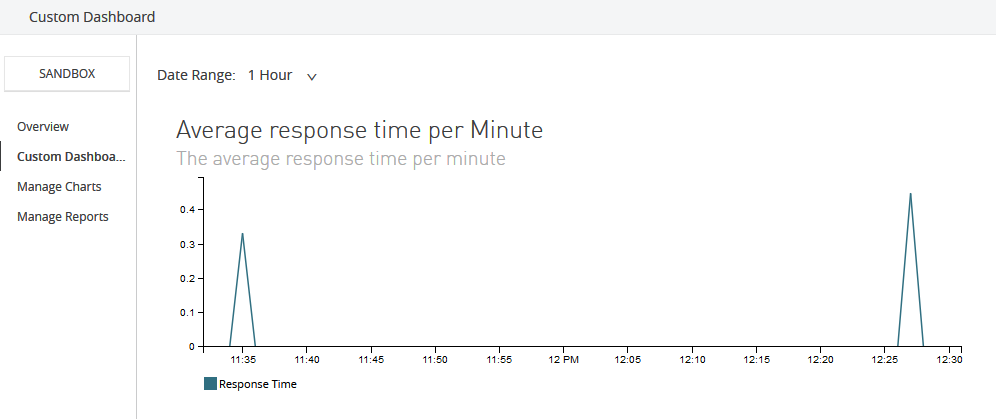
After you have saved your chart, select Custom Dashboard. Now you can drag your just made chart onto the canvas and voila. You own custom Dasboard.
So inPart 1 we saw the design of an API. In Part 2 we saw the implementation and in this part we saw how we could manage the API. So this concludes the basic walk through of the API life cycle.
Reference:
Pingback: Designing a simple Salesforce API using Anypoint platform.